Blink of LED
Aim
How to use block based coding method to control an LED
Components required for the experiment
Arduino UNO Board, Breadboard, LED (any colour) and Resistor (220 Ohms).
LED stands for Light Emitting Diode. An LED is a semiconductor device that emits light when a current flows through it. It is commonly used as an indicator light in electronic devices and for lighting purposes. LEDs are more energy-efficient, have a longer lifespan, and are more durable than traditional incandescent and fluorescent lights. They are also available in a wide range of colors and can be used to create dynamic lighting effects. A resistor in series with the LED pin has to be used to avoid voltage damage.

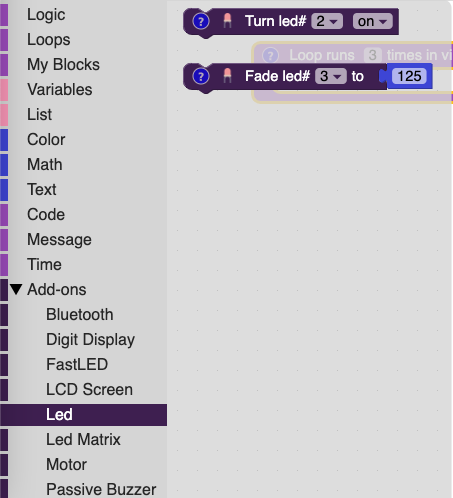
Block Arrangment
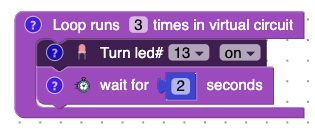
1. On the left hand side you will multiple options. Click on Add-ons and then select LED option. A new list will open. Select the first block i.e. Turn LED#2 on and drag it inside the loop block in the working area.
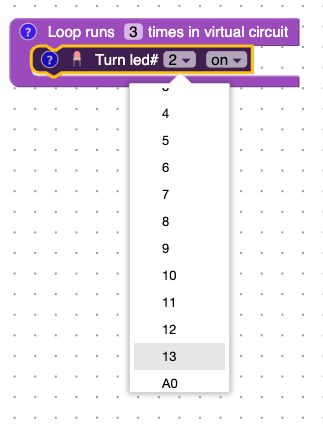
2. Click on the pin number dropdown box and select pin 13 as shown. This way, you can change the Arduino pin connected to any sensor or device.
3. Now click on the Time option from the left hand side option. A new list will be opened. Select the second option. i.e. wait for 0.2 seconds and place it below the Turn on LED block in the main loop blocks.
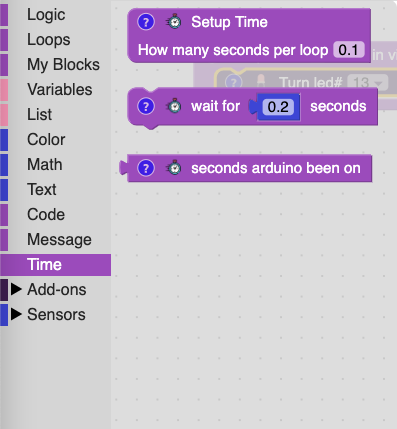
4. You can edit the number of seconds. For this experiment, we will keep the wait time duration as 2 seconds.
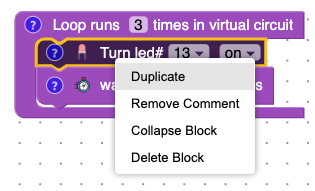
5. Now to blink an LED, we also need to turn off the led after each interval. Right click on the turn on led block and select the duplicate option.
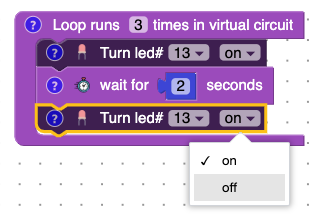
6. First, place this new block below the wait for 2 seconds block. Then click on the dropdown button and change the status of the LED as OFF.
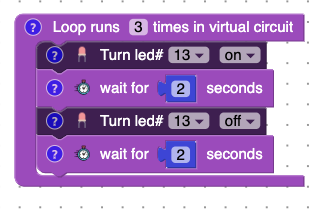
7. Duplicate the wait for 2 seconds block and place it below the turn off led block. This is the complete set of block required to blink an LED for every 2 seconds.
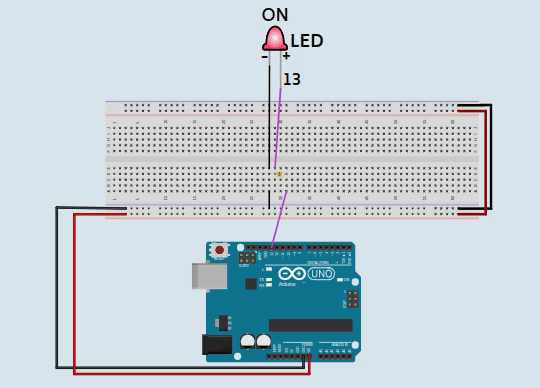
Circuit Diagram
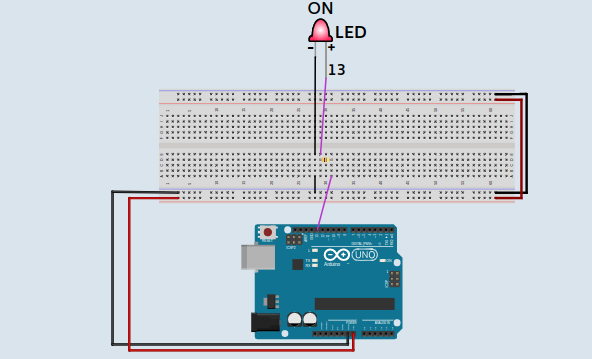
This is the circuit diagram you will see on the right hand side of your simulation screen.
Output